ShopDreamUp AI ArtDreamUp

Deviation Actions


Suggested Deviants


Suggested Collections


You Might Like…


Featured in Groups


Description
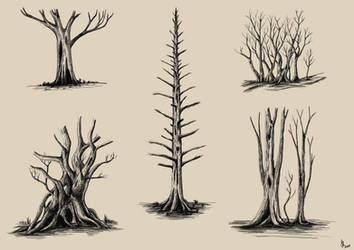
How To Draw Forests
For those people that have recently found my G+ stream, I post short lunchtime tutorials every now and again on different aspects of map making. Today I'm covering forests.
The dark and foreboding wood is a staple of fantasy literature and our own folklore. The Forest looms large in the Grimm Tales - an enemy in its own right. Mirkwood, Fangorn and the Old Forest all harbour ancient powers and perils for the characters of Middle Earth. Without Sherwood forest, Robin Hood would be just another outlaw. Forests are the Wild Other in many stories, acting as borders, sources of mystery and sources of resources and are key to any world map.
Here I've shown two types of forest, coniferous and deciduous, and I'm working in 3/4 view as before.
1. Draw in the outlines of the forests. For deciduous forests, use rounded lines. For conifers, use sharp vertical strokes. Don't worry about keeping the border complete. We're just showing the edge, it doesn't have to be perfect. Make sure the forest flows around hills and mountain edges. The forest's movement will help to delineate the hills and mountains, making them easier to pick out.
2. Add the details. Fill in the areas around the edges of the forest. Try to make sure that lines and features tend to join up horizontally rather than vertically. This will help to sell the 3/4 perspective. Also, make sure you detail forest along ridges and edges. This gives shape and form to your forests, and helps the viewer see the hills beneath the trees. As before, use curving lines for deciduous forest and sharp vertical lines for conifers. If you're doing a black and white map, congratulations! You're done. But if you want colour, read on.
3. Base colours. Here I've shied away from my standard parchment background. Instead I've laid in the base colour on a new layer (under the lines) set to Normal blend, 100% opacity. I used some large grungy brushes with low opacity to build up the colours. You want to start with the lights and then build up to the darks. For the forest, I set colour jitter on the brush settings and added scatter to the brush. This gives a dappled spread of slightly varying greens, which is perfect for selling the varied colours of a forest. I use a yellower green for the deciduous and a bluer green for the conifers. I also take a low opacity dark blue and add a shadow around the base of the trees. It's subtle - but it immediately nails down the forest as a 3/4 view forest with some bulk. It makes a big difference.
4. Colour detail. Here I've added a new layer, with overlay blend mode and 100% opacity. First use dark blue and grungy brush to lay in shadow across the forest. Then I use a very light yellow to pick out the bright highlights on the deciduous forest, and a very light turquoise on the conifers. Again, use rounded shapes for the deciduous trees, and vertical spikes on the conifers.
And we're done!
More tips can be found by visiting the tutorials page of my blog: [link]
Please feel free to reshare this to others who might find it useful, and let me know if you have any questions, comments or topics you'd like to see covered.
Image size
1491x827px 160.65 KB
© 2012 - 2024 torstan
Comments16
Join the community to add your comment. Already a deviant? Log In
Thanks!